How do I set up network printers shared from Synology NAS on Windows?
Last updated:May 19, 2022
How do I set up network printers shared from Synology NAS on Windows?
Purpose
Synology NAS can assume the role of a print server in your office or home environment so that the clients’ computers within the local network will be able to use USB printers attached to your Synology NAS.
This article guides you through how to set up a shared print server via Synology NAS on a Windows computer.
Environment
Check that the printer is ready for set up via the following tools:
- Confirmed your USB printer is compatible with Synology NAS. Please visit our compatibility page here.
- Printer must be connected to the Synology NAS USB port.1
- DSM version required: 6.2 and below
- Synology Assistant: Open the desktop utility, available in Download Center.2
Notes:
- Synology NAS cannot recognize printers connected via USB hubs.
- The memory card function of the connected printer is not supported.
- Certain devices released as of 2022 no longer support the network/USB printer function. For details, refer to the technical specifications for External Devices.
Resolution
Setting Up USB Printers with DSM
Printer sharing must be enabled in DSM first so everyone within the network can find the USB printer on their computer.
To enable printer sharing in DSM:
- Sign in to DSM using an account belonging to the administrators group.1
- Go to Control Panel > External Devices > Printer.
- Select your printer and then click Printer Manager > Set Up Printer.

- Select Network Printer and click Save to save the settings.

Accessing Printer Shared by Synology NAS on Windows
After you have set up your USB printer in DSM, you can add the printer to your network using Synology Assistant.
To add your printer to the network:
- Go to Windows and open Synology Assistant.
- Go to the Printer Device tab.
- Click Add. This action launches a setup wizard to configure printer settings.

- The wizard detects all printers connected to your Synology NAS within the local network. Locate and select the printer device you wish to configure. If you do not see the printer, try clicking the Search button to refresh the list. Click Next to continue.

- Select the manufacturer and model of your printer to set up the software. You may also install the printer software from the installation disk which came with the printer. Then click Next.

- Name your printer and make it the default printer if you wish. Then click Next.

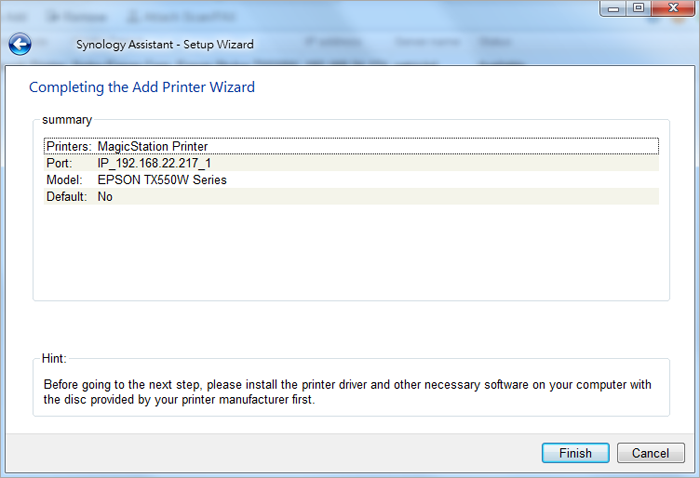
- Synology Assistant will remind you to install the printer driver and software on your computer.

- Finally, review the printer settings you selected and click Finish.
- Once setup is finished, your printer will be ready!
